After installing WordPress, Now you need to download your purchasing file. To download our Hotelone Pro theme, first of all, login to our website britetechs.com. It will redirect the purchase history page after inserting your credentials details. Here you can see your purchasing file and your theme license on this page. Now click on this Download link, the download process will be started.
To install the Hotelone Pro theme with the WordPress Dashboard please follow below-given steps :-
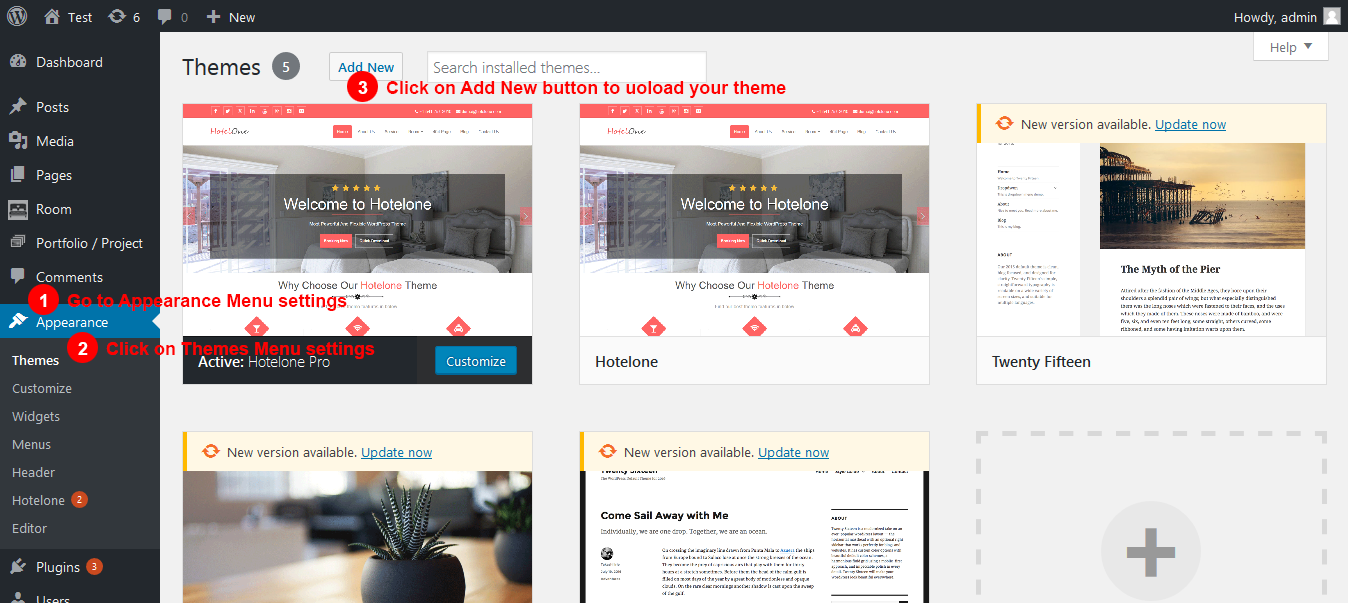
1 Login to WordPress Admin dashboard.
2 Go to Appearance >> Themes.
3 Select Add New button.
4 Use the Upload link in the top links row to upload a zipped copy of a Theme that you have previously downloaded to your machine.
5 Click on Install tab and Activate it.
6 Now your Hotelone Pro theme is ready to use.
Upload theme using the cPanel
If your host offers the cPanel control panel, and the Theme files are in a .zip or .gz archive follow these instructions. Note: This assumes the Theme you download is a compressed (.zip) file containing a folder under which all the Theme files reside.
1. Download the Theme .zip file to your local machine.
2. In cPanel File Manager, navigate to your Themes folder. If your WordPress is installed in the document root folder of your web server you would navigate to “public_html/wp-content/themes” and if you have WordPress installed in a sub-folder called wordpress, you would navigate to “public_html/wordpress/wp-content/themes”.
3. Once you’ve navigated to the Themes folder in cPanel File Manager, click on Upload file(s) and upload that .zip file you saved in Step 1.
4. Once the .zip file is uploaded, click on the name of that file in cPanel, then in the panel to the right, click on “Extract File Contents”, and that .zip file will be uncompressed.
5. Follow the instructions below for selecting the new Theme.